2012年2月13日 星期一

CISCO Port-channel 配置


今天要來說一下 Etherchannel 的 Port-channel 配置
這個是很好用的一项技術應用呢! 實在深感我心

這裡要先提到PAgP 與 LACP這兩種協定:

PAgP : 是Cisco 私有的協定,每30秒數據會發送一次進行偵測
適用範圍: Cisco device to Cisco device

mode: 

Auto :          這種模式會使端口進入被動協商,對PagP數據包有反應但不會發起主動協商
Desirable :  這種模式會使端口進入主動協商。接口會透過發送PAgP來與其他接口進行協商
On:              不使用PAgP來形成Enterchannel
Non-silent:  如果交換機連接到有PAgP能力的設備,可以將接口配置為non silent。non silent為auto或desirable模式指定non-silent關鍵字,如果沒指定就會假設狀態為silent。而silent

。沉默設置被用於連接到文件服務器或包分析儀。該設置允許PAgP,將接口添加至Channel組,並使用接口進行傳輸


LACP: 是IEEE的開放協定的一部分 (802.3ad)
適用範圍: Cisco device to Cisco device 
                   Cisco device to other device
                    other device  to other device
mode:
Passive:會進入被動協商狀態,端口會對LACP數據包做出回應,但端口不會主動發起協商 
Active:會進入主動協商狀態,端口會通過發送LCAP數據包來主動與其他接口進行協商
On: 強制形成EtherChannel ,並且不需要使用PAgP或LACP進行協商

範例:
CS1 是一台L3的Switch ,  ES1 L2的Switch 
老闆說因為沒錢買10GB Lan的Switch ,但ES1的流量實在太大, 要不你自己想辦法改一改吧....讓Switch與Switch之間的水管通道大一點...越大越好 越大越好 越大越好

小麥克: 阿是要多大....OOXX

CS1:   gi0/1 - gi0/2 Port
ES1:   gi1/1- gi1/2 Port


做法如下:
=================================================================
1. 關閉CS1   gi0/1 - gi0/2 Port與ES1的 gi1/1 - gi1/2 Port


CS1設定
CS1(config)#int range gi0/1-2
CS1(config-if-range)#sh


CS1(config)#int port-channel 1
CS1(config-if)#switchport trunk encapsulation dot1q 
CS1(config-if)#switchport mode trunk 
CS1(config-if)#exit

CS1(config)#int range gi0/1-2
CS1(config-if-range)#switchport mode trunk 
CS1(config-if-range)#channel-group 1 mode ?
       active     Enable LACP unconditionally
        auto       Enable PAgP only if a PAgP device is detected
        desirable  Enable PAgP unconditionally
        on         Enable Etherchannel only
        passive    Enable LACP only if a LACP device is detected

CS1(config-if-range)#channel-group 1 mode on

%LINK-5-CHANGED: Interface Port-channel 1, changed state to up
%LINEPROTO-5-UPDOWN: Line protocol on Interface Port-channel 1, changed state state to up


ES1設定
ES1(config)# int range gi1/1-2
ES1(config-if-range)#shutdown 


ES1(config)#int port-channel 1
ES1(config-if)#switchport mode trunk 


ES1(config)#int range gi1/1-2
ES1(config-if-range)#switchport mode trunk 
ES1(config-if-range)#channel-group 1 mode on 

%LINK-5-CHANGED: Interface Port-channel 1, changed state to up
%LINEPROTO-5-UPDOWN: Line protocol on Interface Port-channel 1, changed state to up


CS1與ES1檢查方式相同:


檢查1:
CS1#show interfaces etherchannel  <<檢查一下所有etherchannel的狀態如何


GigabitEthernet0/1:
Port state = 1
Channel group = 1         Mode = On       Gcchange = -
Port-channel  = Po1       GC = -          Pseudo port-channel = Po1
Port index    = 0         Load = 0x0      Protocol = -

Age of the port in the current state:  00d:00h:06m:18s

GigabitEthernet0/2:
Port state = 1
Channel group = 1         Mode = On       Gcchange = -
Port-channel  = Po1       GC = -          Pseudo port-channel = Po1
Port index    = 0         Load = 0x0      Protocol = -

Age of the port in the current state:  00d:00h:06m:18s

----
Port-channel1:Port-channel1
Age of the Port-channel   = 00d:00h:20m:15s
Logical slot/port   = 2/1             Number of ports = 2
GC                  = 0x00000000      HotStandBy port = null
Port state          =
Protocol            =   3
Port Security       = Disabled

Ports in the Port-channel:

Index   Load   Port     EC state        No of bits
------+------+------+------------------+-----------
  0     00     Gig0/1   On                 0
  0     00     Gig0/2   On                 0
Time since last port bundled:    00d:00h:06m:18s    Gig0/2


檢查2:

CS1#show etherchannel port-channel   << 看一下etherchannel下的port-channel狀態
                Channel-group listing:
                ----------------------

Group: 1
----------
                Port-channels in the group:
                ---------------------------

Port-channel: Po1
------------

Age of the Port-channel   = 00d:00h:29m:23s
Logical slot/port   = 2/1       Number of ports = 2
GC                  = 0x00000000      HotStandBy port = null
Port state          = Port-channel
Protocol            =   PAGP
Port Security       = Disabled

Ports in the Port-channel:

Index   Load   Port     EC state        No of bits
------+------+------+------------------+-----------
  0     00     Gig0/1   On                 0
  0     00     Gig0/2   On                 0
Time since last port bundled:    00d:00h:15m:26s    Gig0/2


檢查3:


CS1#show ip interfaces  brief <<看一下state and protocol是否都upup
Interface              IP-Address      OK? Method Status                Protocol

~中間省略~ 

Port-channel 1         unassigned      YES unset  up                    up


檢查4:


CS1#show interfaces trunk  <<檢查一下Port-channel的 trunk是否正常


Port        Mode         Encapsulation  Status        Native vlan
Gig0/1      on           802.1q         trunking      1
Gig0/2      on           802.1q         trunking      1
Po1         on           802.1q         trunking      1

Port        Vlans allowed on trunk
Gig0/1      1-1005
Gig0/2      1-1005
Po1         1-1005

Port        Vlans allowed and active in management domain
Gig0/1      1
Gig0/2      1
Po1         1

Port        Vlans in spanning tree forwarding state and not pruned
Gig0/1      1
Gig0/2      1
Po1         1


檢查5:
CS1#show interfaces  <<看一下Pore-channel1的介面詳細資訊


Port-channel 1 is up, line protocol is up (connected)
  Hardware is Lance, address is 0010.1167.4c4a (bia 0010.1167.4c4a)
  MTU 1500 bytes, BW 2100000 Kbit, DLY 1000 usec,
     reliability 255/255, txload 1/255, rxload 1/255
  Encapsulation ARPA, loopback not set
  Keepalive set (10 sec)
  Half-duplex, 2100Mb/s
  input flow-control is off, output flow-control is off
  ARP type: ARPA, ARP Timeout 04:00:00
  Last input 00:00:08, output 00:00:05, output hang never
  Last clearing of "show interface" counters never
  Input queue: 0/75/0/0 (size/max/drops/flushes); Total output drops: 0
  Queueing strategy: fifo
  Output queue :0/40 (size/max)
  5 minute input rate 0 bits/sec, 0 packets/sec
  5 minute output rate 0 bits/sec, 0 packets/sec
     956 packets input, 193351 bytes, 0 no buffer
     Received 956 broadcasts, 0 runts, 0 giants, 0 throttles
     0 input errors, 0 CRC, 0 frame, 0 overrun, 0 ignored, 0 abort
     0 watchdog, 0 multicast, 0 pause input
     0 input packets with dribble condition detected
     2357 packets output, 263570 bytes, 0 underruns
     0 output errors, 0 collisions, 10 interface resets
     0 babbles, 0 late collision, 0 deferred
     0 lost carrier, 0 no carrier
     0 output buffer failures, 0 output buffers swapped out


這樣完成 Port-channel  的設定了~ 幹的好阿小麥克
接下來...我們來實驗一下...斷掉其中一個Prot-group 的Port 會發生甚麼事
下圖接上兩台PC

PC-A:192.1680.1
PC-B: 192.168.0.2
讓PC-A不斷的ping PC-B 看起來都很正常


從ES1中showdown gi1/1 假裝這條線失憶了XD..沒想到這port-channel就掛掉了


所以說....有一好沒兩好...要解決這問題我看在建兩組Port-channel然後再做STP或RSTP就可解決增加頻寬也有備援,缺點當然是損失的Port會比較多一點


疑難排解:
=================================================================
目前建置都很順...我也不知道該產生出甚麼問題,有遇到問題

=================================================================

當然, 如果您有更好的方法,也請與我交流.....因為我只是菜鳥一個


2012年2月12日 星期日

Cisco VTP 設定

今天要來說一下VTP的設定
下圖是個企業常見的架構(通常這跟口袋深淺或是規模比較有關係)

CS1 是一台L3的Switch ,  ES1 、ES2是一台L2的Switch , 老闆說想來切幾個VLAN要求你把VTP建置起來並只能以L3 Switch做為VLAN的新增、刪除...等等的 


做法如下:
=================================================================

CS1設定
CS1(config)#vtp domain mmc.local    <<建立一個VTP domain
CS1(config)#vtp password 12345  <<密碼 (所有mmc.local domain都要使用相同密碼)
Setting device VLAN database password to 12345
CS1(config)#vtp mode server  << Server mode
CS1(config)#vtp version 2 <<使用VTP 版本為 version 2


ES1設定


ES1(config)#vtp domain mmc.local
Changing VTP domain name from NULL to mmc.local
ES1(config)#vtp password 12345
Setting device VLAN database password to 12345
ES1(config)#vtp mode client
Setting device to VTP CLIENT mode.
ES1(config)#vtp version 2


ES2設定
ES2(config)#vtp domain mmc.local
Changing VTP domain name from NULL to mmc.local
ES2(config)#vtp password 12345
Setting device VLAN database password to 12345
ES2(config)#vtp mode client
Setting device to VTP CLIENT mode.

ES2(config)#vtp version 2


你看VTP很簡單吧~但有人說話了...何以見得這樣就可以運作? 問的好
接下來驗證一下....


檢查CS1
CS1(config)#vlan 22 <<創建一個VLAN 名稱為TEST
CS1(config-vlan)#name test


CS1#show vtp status 
VTP Version                     : 2
Configuration Revision          : 3
Maximum VLANs supported locally : 1005
Number of existing VLANs        : 6  <<ES1、ES2為client mode 都應為相同值
VTP Operating Mode              : Server
VTP Domain Name                 : mmc.local
VTP Pruning Mode                : Disabled
VTP V2 Mode                     : Enabled
VTP Traps Generation            : Disabled
MD5 digest                      : 0xBD 0x2F 0x6C 0xD0 0x59 0x7C 0x2A 0x17


CS1#show vlan brief 
VLAN Name                             Status    Ports
---- -------------------------------- --------- -------------------------------
1    default                          active    Fa0/1, Fa0/2, Fa0/3, Fa0/4
                                                Fa0/5, Fa0/6, Fa0/7, Fa0/8
                                                Fa0/9, Fa0/10, Fa0/11, Fa0/12
                                                Fa0/13, Fa0/14, Fa0/15, Fa0/16
                                                Fa0/17, Fa0/18, Fa0/19, Fa0/20
                                                Fa0/21, Fa0/22, Fa0/23, Fa0/24
                                                Gig0/1, Gig0/2
22   test                             active    
1002 fddi-default                     active  
1003 token-ring-default               active  
1004 fddinet-default                  active  
1005 trnet-default                    active  
CS1#
CS1#


ES1與ES2檢查方式相同:
ES1#show vtp status
VTP Version                     : 2
Configuration Revision          : 0
Maximum VLANs supported locally : 255
Number of existing VLANs        : 5
VTP Operating Mode              : Client
VTP Domain Name                 : mmc.local
VTP Pruning Mode                : Disabled
VTP V2 Mode                     : Enabled
VTP Traps Generation            : Disabled
MD5 digest                      : 0xB4 0xC6 0xCC 0x3A 0x90 0x77 0x91 0x29
Configuration last modified by 0.0.0.0 at 3-1-93 00:56:35


看看有沒有同步VLAN ....答案是沒有................原因是沒Trunk


CS1(config-if)#exit
CS1(config)#int range gi0/1 - gi0/2
CS1(config-if)#switchport trunk encapsulation dot1q 
CS1(config-if)#switchport mode trunk 

%LINEPROTO-5-UPDOWN: Line protocol on Interface GigabitEthernet0/1, changed state to down
%LINEPROTO-5-UPDOWN: Line protocol on Interface GigabitEthernet0/1, changed state to up

%LINEPROTO-5-UPDOWN: Line protocol on Interface GigabitEthernet0/2, changed state to down
%LINEPROTO-5-UPDOWN: Line protocol on Interface GigabitEthernet0/2, changed state to up


完成後再次檢視vlan同步了沒:
ES1#show vlan brief

VLAN Name                             Status    Ports
---- -------------------------------- --------- -------------------------------
1    default                          active    Fa0/1, Fa0/2, Fa0/3, Fa0/4
                                                Fa0/5, Fa0/6, Fa0/7, Fa0/8
                                                Fa0/9, Fa0/10, Fa0/11, Fa0/12
                                                Fa0/13, Fa0/14, Fa0/15, Fa0/16
                                                Fa0/17, Fa0/18, Fa0/19, Fa0/20
                                                Fa0/21, Fa0/22, Fa0/23, Fa0/24
                                                Gig1/2
22   test                             active  
1002 fddi-default                     active  
1003 token-ring-default               active  
1004 fddinet-default                  active  
1005 trnet-default                    active  
ES1#


這樣完成VTP的設定了~ 幹的好阿小麥克


疑難排解:
=================================================================
1.為什麼執行switchport mode trunk會出現下列這問題?


CS1(config-if)#switchport mode trunk
Command rejected: An interface whose trunk encapsulation is "Auto" can not be configured to "trunk"


Ans: 兩邊至少有一邊要先設定802.1Q的協定,才有辦法自動,勤奮點的話兩邊都設定
          switchport trunk encapsulation dot1q 後再執行switchport mode trunk

2.設定看起來都很正確但VTP就是沒辦法同步?
Ans:

   a.  用 #show vtp status 確定所有的Switch都有設定 (domain、version)
   b.  用 #show vtp password 確定兩邊的密碼都是一樣的
   c.  用 debug sw-vlan vtp events 與 debug sw-vlan vtp events packets 來看錯誤資訊

=================================================================

當然, 如果您有更好的方法,也請與我交流.....因為我只是菜鳥一個


2012年2月9日 星期四

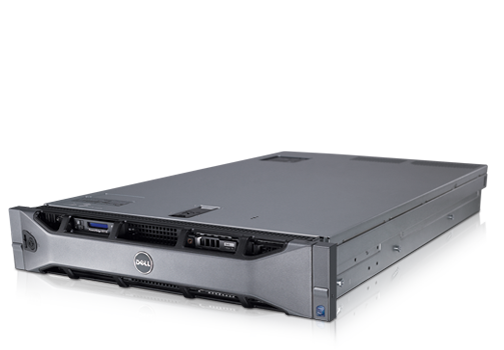
DELL R710設備 Part I

最近公司要導入VM,在預算壓力下沒能購入IBM SERVER(沒辦法實在太貴了,不...應該說口袋太空的關係) ,反而轉向與DELL 進行交易,這已經是第二次了

根據官網的標題是這樣說的:


專門依據客戶需求的設計

新一代 Dell™ PowerEdge™ R710 專門依據客戶需求量身打造。 我們認真傾聽意見並且關注每個細節,將您的需求轉化為簡易的作業及各種創新功能。

PowerEdge R710 充分利用了 Dell 的系統通用性;IT 管理員只要瞭解其中一個系統,便已經瞭解了在管理 Dell 新一代伺服器時所需的邏輯。 各種元件的邏輯配置與電源配置,讓您在未來可以輕鬆、簡易地進行安裝與重新部署。

此外,Dell 最新的 PowerEdge 伺服器採用裝設在伺服器前方的圖形化與互動式 LCD,方便您監控系統狀況、警示與控制基本管理組態。 伺服器內還裝設了交流電錶和


不過說真的,我喜歡他前置互動式 LCD,使用的W數都有...很貼心的設計


本次預算可買到的是DELL R710
搭載兩顆2.4G CPU 12M
2顆500G SAS 15K
記憶體:96GB
Power: 1080W x 2

相關規格可以參考官網:   DELL R710
老實說我不得不承認,DELL 現在的外觀比以前的好看多了...尤其是外面那一塊蓋子就是多了點霸氣


脫掉衣服看看內裝

感覺滿簡潔的

未上蓋子前


這Power大小真的有1080瓦嗎? 有點懷疑 不過光是在BIOS下一開機就吃掉216W